
Second Booking Route for Exclusive Contacts
Tip
In timum, every property has a second booking channel besides the standard booking link, the Second Booking Link (see Resource Channels). It has its own settings — for example its own booking mode (bookable or requestable) and its own bookable appointment types — and an Invite button, which you use to invite individual contacts directly from timum. This page shows how to send this link automatically via an onOffice email template.
Variant 1: Second booking link for standardized, automated processes
Creating an onOffice email template with an automatically generated second timum booking link (copy-and-paste link kit).
Two objectives
A) Exclusive booking channel only, with the standard booking channel deactivated
B) Use the second booking link in parallel with the standard link
Steps
- Optional for Objective A: deactivate the standard booking link
- Create a second email template for the second booking channel
- Assign appointment types to the Standard and Second Link booking channels
- Create appointments and assign an appointment type
- Invite contacts to book an appointment
Objective A) Exclusive link only – deactivate the standard link
In timum, open Appointment Booking - Settings for the property.
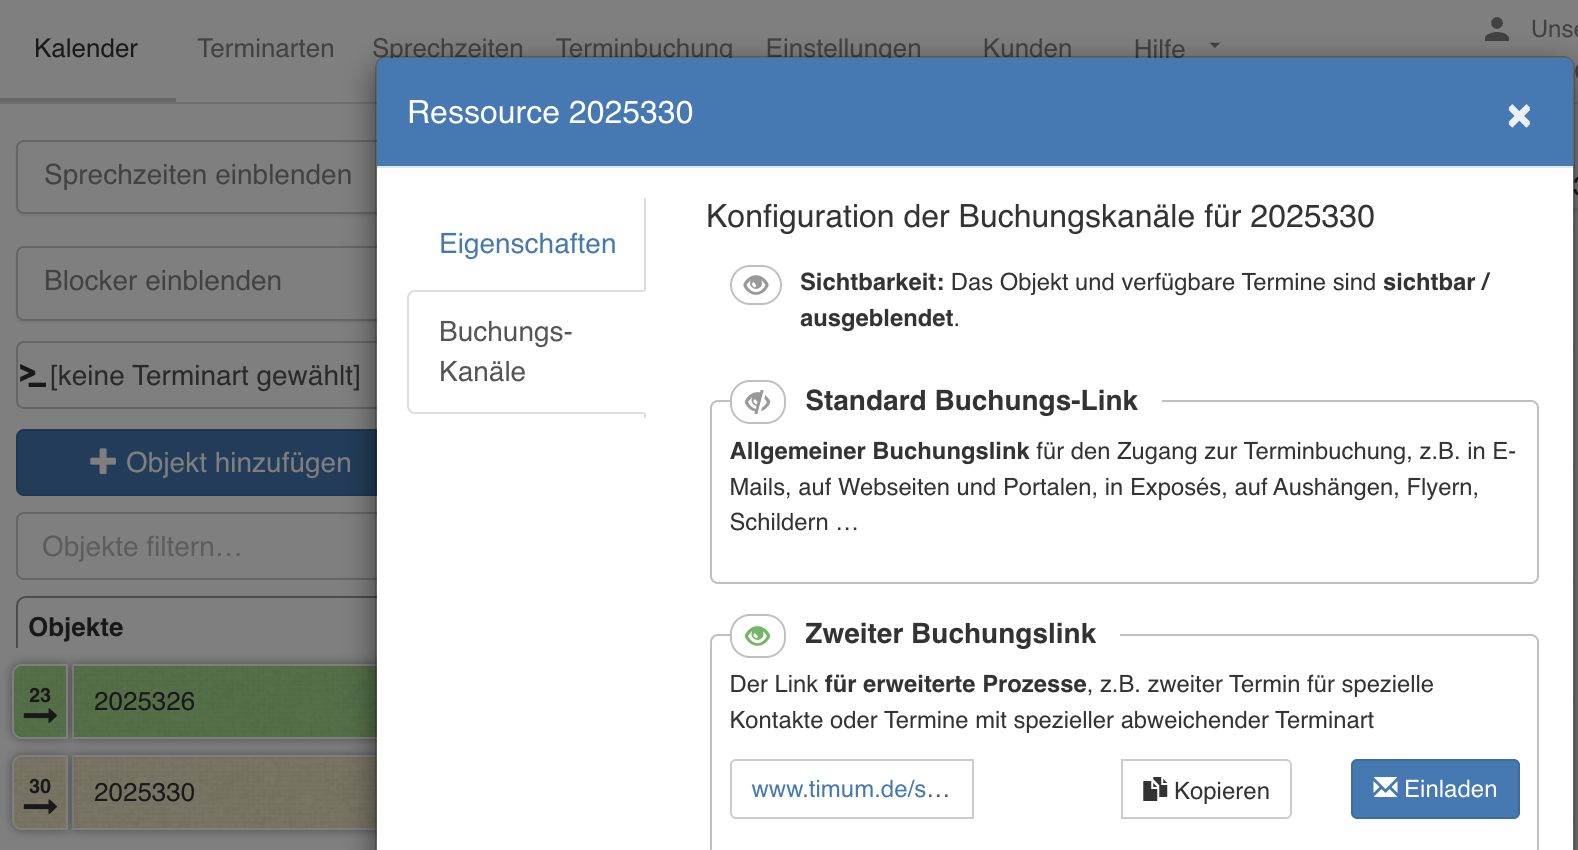
Click the eye icon next to Standard Booking Link to deactivate this general booking channel.
For both objectives
In addition to the standard appointment template for timum appointments in onOffice, a second email template is required for the exclusive booking link, so you can differentiate access to booking different appointments for different recipient groups.
Creating a second email template in onOffice
In onOffice, open the email templates in the folder oO-Marketplacevorlage and copy the standard template timum – Terminkoordination für Immobilien.
Name the copy, for example, "timum booking invitation for second booking link".
Adjust the link kit in this template as described below, and adapt the template's text to your own process requirements.
Adding the link kit to the email template
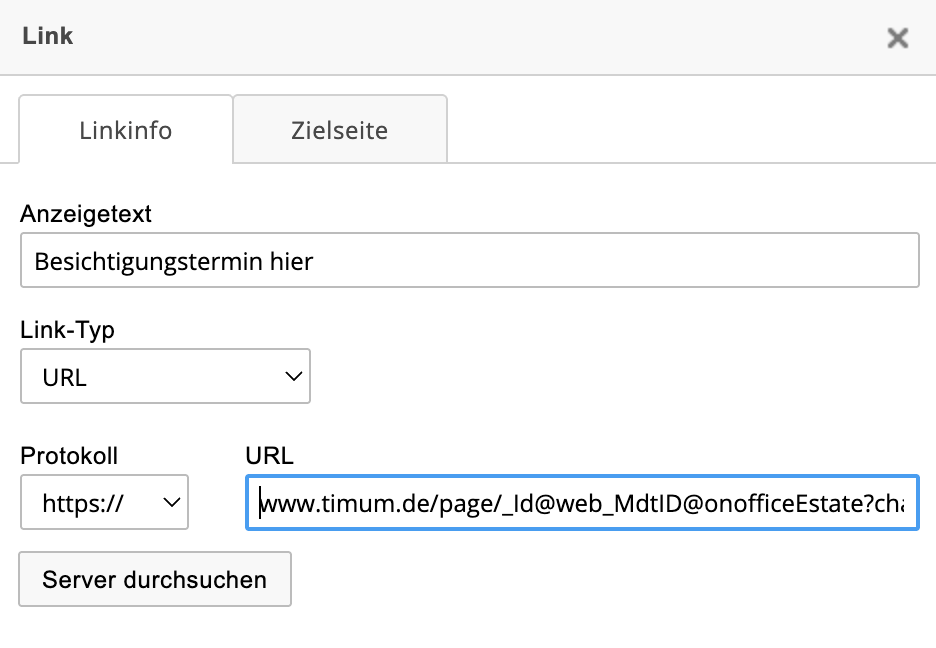
Insert the following link kit in full into the template in onOffice, using the link function (!).
Important
https://www.timum.de/page/_Id@web_MdtID@onofficeEstate?channelKey=RESOURCE_EXCLUSIVE&pData=%7B%22platform%22:%22onoffice%22,%22address%22:%22_AdrDatensatznummer%22,%22tenantId%22:%22_MdtID%22%7DPersonalized link: this automatically creates a personalized link for each recipient, through which the person booking is reliably identified and matched to the corresponding address record.
Layout adjustment (optional)
You control the appearance of the booking page via the slug in the URL (instead of "/page/", e.g. "/list/") or via the calendarFrontend parameter. Both variants are described with all keywords in the article Generating Booking Links in onOffice and on Websites.
Assigning appointment types to the Standard and Second Link booking channels
In timum, open Appointment Booking - Settings for a resource (consultant or property).
In the Standard Booking Link section, set Bookable Appointment Types to Selection and specify which appointment types should be bookable via this first booking channel.
In the Second Booking Link section, also set Bookable Appointment Types to Selection and specify which appointment types should be bookable via the second booking channel.
Variant 2: Selective booking link for irregular, variable use
Follow the instructions in Exclusive Appointment Invitation.